

In many skyline cityscape photographs, photographers like to shoot during two times of the day: the golden hour and the blue hour. Each hour has its own perks, but it can be difficult for a photographer who hasn’t shot during these times to know exactly what to do to get quality, breathtaking shots during these hours.
The first step in knowing how to shoot during the golden and blue hours is knowing what they are and how they are different. Let’s start out with some definitions.
THE GOLDEN HOUR
The Golden Hour is the time of day shortly after sunrise or just before sunset. During this time, the daylight is redder and typically softer than it is when the sun is higher in the sky. When the sun is close to rising, its light travels through a greater depth of atmosphere so illumination comes primarily from indirect light from the sky. Giving an exact numerical time for the Golden Hour isn’t possible as it varies depending on where you live in the world. You will know it is the Golden Hour because buildings in your skyline cityscape photo will be saturated in a golden hue. The website Golden-hour.com shows you exactly what time you have to be there to see this amazing light. Don’t forget to check the weather conditions, because cloudy days aren’t that spectacular.

THE BLUE HOUR
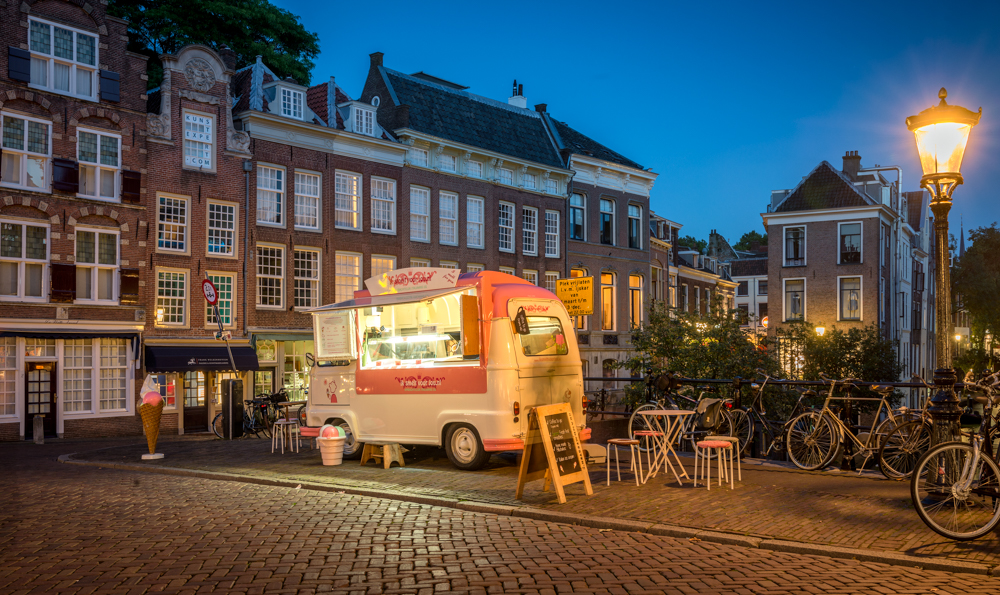
The Blue Hour is the period of twilight early in the dawn each morning, or late in the dusk of each evening. During this time, the sun is at a significant depth below the horizon. During this time, red light passes into space while blue light is scattered in the atmosphere and reaches the Earth’s surface. Just like the Golden Hour, there is no exact time for the Blue Hour because it varies around the world. You will know it is the Blue Hour because your photo will have a predominately blue hue or check the Blue Hour Site to see what time it starts and end.
SHOOTING IN “THE HOURS”
There are a few standards in shooting during both hours. Your first step in either hour is going to be calculating when it will occur in your area and making a plan before heading to your shoot location. You can check the above mentioned websites that can help you calculate these. Also, be sure you have a plan of action and set aside extra time to be sure you arrive safely and have time to set up your camera. It is also a great idea to use a tripod and self timer to be sure you don’t jostle your camera and risk making your shot blurry.
SHOOTING IN THE GOLDEN HOUR
Here are the best things to do when shooting in the Golden Hour:
1. Don’t use a wide aperture: If you use a tripod try to use a smaller aperture between f/8 and f/11. For many lenses this is the sweet spot to get the best sharpness. A smaller aperture also makes the sun (in case it is in the photo) more star shaped instead of a big yellow-orange circle. So the sunbeams will be better visible.
2. Balance your shot: The brightness of the sky will slightly overpower your cityscape photo. Begin by bracketing your shots. In addition, be sure to white balance your shot. You can either balance your camera yourself, or you can try using the “cloudy” or “shadow” setting, which will capture your city in a real golden glow.
3. Take time and use manual focus: This is optional, but using manual focus assures that you will have the sharpest image possible. If you don’t feel comfortable using this setting use auto. A helpful tip: if you can’t tell if your shot is in focus using the view finder, turn your camera to live mode where you can zoom in to areas and focus them by looking on your digital review screen.
SHOOTING IN THE BLUE HOUR
Here is how to shoot in the Blue Hour.
1. Shoot in aperture or manual mode: Using this setting allows you to choose your aperture. When photographing buildings and skylines you want to take control over the depth of field. Again an aperture between f/8 and f/11 is great for this type of photography.
2. Keep the ISO low: Always use the lowest ISO possible to get high quality photos. For this you need a tripod of course since the exposures will be longer during the blue hour.
3. Set your white balance: Do you really want the amazing look of the blue hour? Try to set your white balance in the “Tungsten” (sometimes called Incandescent) setting or set the Kelvin temperture yourself around 3400K.

